Friday, August 31, 2012

Reward tickets

So, it's the last Friday before school starts, and I have to say I feel really sad. Sad that Summer is over, sad that I don't get to spend these lovely hot days with my Kiddo's, sad that time is just moving too fast.  I know for some parents, back to school is a celebration, and a relief, and I understand why some may feel that way. For me... it's a reminder that they are growing and all too soon this whole experience will be forever past.  Now, remember, I am someone who does NOT deal well with change, so perhaps that is why I feel this way. But honestly, I love being around my kids. I love hearing them talk to each other and I love hearing their thoughts and stories on day to day stuff.
Anyway, enough sentimental stuff and onto today's project.
This weeks challenge was "back to school". I decided to that instead of a card I would do a reward ticket book for my older son who is one of those kids who seem to sometimes need an extra push to get him to put more into his school work.  
Here's my what it looks like:
The outside


The inside


The back

I started with die cutting the gate fold card out of white card stock. I then cut the star print pattern paper and left a thin border. On the inside, I added a small strip to make a pocket and added a strip of the star print paper to that too.
Next I stamped the planets and galaxies stamp onto  Bella's best white card stock, and colored it in with copics, I also die cut a star out of white and colored that in with copics too. I then added a layer of glossy accents to the images and the star and set them aside to dry.
For the tickets, I carefully cut the center of one of my ticket stamps from the scraplines ticket stamps and stamped just the border onto grey cardstock. I asked my DH to fill them out since he has beautiful handwriting and I have foul scratch. :)  I popped the images onto the front with foam dots.  I used this Dr Seuss sentiment from Bye,bye girl , that I just LOVE!  So appropriate for back to school, I think :)

So the idea is, if he tries really hard and accomplishes his tasks, he gets to claim a ticket of his choice as a reward.

Have a great weekend :)Tasha

PS ( the 30 min past bed time one is redeemable ONLY on weekends, ha! LOL)

Friday, August 24, 2012

Painter girl

It's Friday again, and I hope you are enjoying yourselves wherever you are:)
Todays challenge was a sketch challenge.
Here's the sketch:
And here is my card :
The background piece was made with alcohol inks on glossy paper. I then die cut the window piece and stamped the image of Painter Meg onto it. I colored her in with copics and then stamped her again onto masking paper and created a mask. I then masked her off and colored the background in with distress inks.  I mounted her onto the background panel and added a sentiment banner:)
Have a great weekend :)
Tasha


Wednesday, August 22, 2012

Snowflake tags.

I'm back with some gift tags to share.  I have fallen way behind on my posts and need to play a bit of catchup! So here goes:


 And here's what the back looks like :)
I have been wanting to turn these images into tags for a while now, I just have not had time to. But I finally managed to play with them. I love how they came out. I think they are sure to add some fun to any Christmas gift, don't you think?
They were fun to make too. I masked of the images that I colored in with copics and used distress inks to color the backgrounds. I added some white gel pen snow and some stickles.  For the tags I die cut the snowflakes and the scalloped circles out of white card stock covered in double sided tape and glittered them with glitter ritz. 

Thanks for coming by,
Tasha :)))

Sunday, August 19, 2012

Anise Ketto

Hello pretty people :)
Today I have a card to share that was LOTS of fun to make.
I started by making my own background with the embossed resist technique ( I do LOVE this technique!):
I started with the Anise Ketto flowers, that I stamped and heat embossed onto plain white card stock with white embossing powder.  Next I whipped out my spray mists and sprayed the piece.  I stitched a border around the edge and distressed the edges with some vintage photo distress ink.  I mounted this onto a piece of rustic cream card stock that I distressed with some vintage photo too.  I did the same with the sentiment banner that I die cut with the my favorite things banner die.
For the image I stamped the Anise Ketto girl,  onto white Bella's best card stock and punched out a 2 inch circle. I then colored her in with copics.  I added some shimmer with a gel pen and distressed the piece with distress inks in Antique linen and vintage photo.  I added a thin layer of glossy accents to the whole piece to add a bit of shine and mounted it onto a scalloped circle die cut piece. I popped the piece up onto the base with foam tape :)

Thanks for stopping by.
Tasha

Friday, August 17, 2012

HB2U

Happy Friday :)
Today I have my card for this weeks Bellarific Friday challenge all ready for you:)
This weeks challenge was "Birthday wishes"
Here's my card:)
I heat embossed the Microphone by Rheea image onto stone grey card stock.  Next I made a stone grey A2 card base and cut off a 1 1/4 inch strip off the side. I used a die to cut the holes onto the back strip that was showing and I die cut the letters with smokey grey card stock.  I used my scallop punch to make a border and cut a 3/4 inch strip of plain smokey grey to border the image.  I added some strips of score tape that I added glitter ritz to and I added some smooth gems to the scallops. Lastly, I popped the image onto the base with mounting tape :)

Next weeks challenge is a sketch challenge.
Here'e the sketch:


Have a great weekend and thanks for stopping by:)
Tasha

Thursday, August 16, 2012

Shaving foam jane :)

Hello again :)
I am just popping in to share a card quickly. We are going on vacation and trying to get everything ready is no small job.
So I thought I would take a break and share something pretty :)
 I am entering this card into the Runnway inspired challenge


I started by making the dress "fabric" piece using the shaving foam and ink technique.  I then stamped the Little birdie Jane image onto a piece of rustic white card stock and cut it out. Next I stamped the image onto a plain white piece of cardstock and colored in the hair and body and glued the dress to the image. I then ran it through my bigshot with the PTI sunshine impression plate.  I mounted that onto a piece of ripe avocado and then mounted that onto the rustic white base. I left it sentimentless for the time being, until I decide what I occassion I will need it for :)
Hope you are enjoying the last few weeks of summer vacation:)
Tasha

Friday, August 10, 2012

Hello, there!
Today , I am back with another bellarific Friday card. This weeks challenge was a sketch challenge and here is my take on the sketch:
For this card. I die cut the oval and stamped the flower garden. I colored them in with copics and distressed the edges with some antique linen and vintage photo distress inks.  I used some patterned paper from Lillybee's jingle 6X6 pad and added some ribbon that I pleated along the front.  To finish it all off I added some pearls to the flower centers.

Well, that's it for now. I'll be back soon with some other cards to tantilize your taste buds :)
In the mean time, I hope you have a great (albeit, wet) weekend :)
Next weeks challenge is all about Birthdays! I hope you can join us and I can't wait to see what you come up with :)
Tasha

Friday, August 3, 2012

Summertime :)

Happy Friday!  This is going to be a quick post to share my card for this weeks challenge before I run out.

I can't believe it is August already. We are half way through summer vacation and I am going to enjoy every last minute of it before the rat race begins again.  I love having my kids home and doing fun things with them, even thought they drive me nuts sometimes, I adore those little stinkers :)
Anyway, enough about that, here's my card for this weeks challenge.
Summertime!:
Next weeks challenge is a sketch challenge, here's the sketch:

I hope you can play along :)
Enjoy your weekend!
Tasha

Saturday, July 28, 2012

Friends

Oh, boy! I am late. I was having trouble signing in, but I did not have time to sort it out until now, since I got a call this morning to say our car ( that was in the shop to repair a minor affair it had with a wall, ;) ) was ready.  It was only supposed to be ready next week so I was unprepared but very excited to go and get it. Then came all the running around that I was unable to do without a car all week.

Anyway, I finally managed to reset my password and sign in, so here goes.
This weeks challenge was a sketch challenge. Here is my card:
 And here is the sketch:
I love how this card came together. I had no idea where I was going when I started, but I have been wanting to play with these stamps for a while now, so I started there. I did not know that it was going to be my card for the challenge.  Suddenly I looked at the sketch again, and everything just clicked! I started with stamping the Polaroid frame and masking it to stamp the images. I colored them in with copics and them distressed them with vintage photo and antique linen.  I remembered that I had bought this film strip roll from Tim Holtz ages ago, and never quite found the right use for it. I pulled it out and then I had the idea of using the smaller images that come with these stamps, to create a negative strip. So with some masking and stazon, I managed to make the film strip.  Lastly, I wanted something else, I rememebered I had some patterened paper with tickets on them, so I cut out a few and added them after I distressed them.
I love the final card. Lots of fun!

Next weeks challenge is all about Summer....summer....time! I hope you can play along. If you do, e-mail your card to Emily buy Thursday.

Thanks for stopping by:)
Tasha

Monday, July 23, 2012

Shaping up blog hop.

Looks like I am on a roll!!!  Ha!
I have a card to share for the Shape up blog hop:
I used my silhouette machine to cut the shapes and put them all together. I heat embossed the sentiment with some zing powder :)
thanks for looking :)
Tasha

Friendship Bracelet

I know I  am too late to enter this into the challenge, but thought I would share it anyway. 
Since I did not have the die or paper that was part of the kit you could buy for stamp-a-faire, I thought I would use my silhouette machine to make the triangle needed to make one anyway. I was pleasantly surprised to find that the lovely Sarah Bailey already has paper bead downloads, so that mad my life SUPER easy.  She also had the patterns to make different sizes and shapes, hence the different sized beads on my bracelet. Now since neither the paper or die were PTI, I decided to try making a charm with shrink plastic, and I LOVE it! I die cut the flip flops and punched a hole to allow me to add a jumping to hang it from. I then shrunk it with my heat gun, colored it in with copic markers and added a gem.
I love this little charm, I think I might just have to make a few more. I want to experiment with the coloring so it is more even. 
Tasha

More stamp-a-faire shares

I'm back with a few projects for some of the stamp-a-faire challenges.
First up, I have a card to share for the Limited supplies challenge:

For this card, I used Hawaiian shores,simply chartreuse, Quatrefoil cover plate, text style basics, damask design, and rosie posie.

Next up I have the handmade embellishment challenge:

For these I used, bloom builders 3, limitless layers, aqua mist, summer sunrise, pure poppy, orange zest, simply chartreuse, and winter wisteria.

Then I have the knots challenge:

For this card I used, button boutique and dies, stitches and swirls and hanging out, and dies. I  do not have any PTI ribbon yet so I used some seam binding that I colored with copics to match my colors on the card.

Lastly I have the correspondence challenge:
A while ago I saw this card set on Christina Maclarens blog and thought it was so pretty. I decided to case this set with my own little twist added to the mix :)
I could not take a good picture of all of them together so here are the close ups:


For this set, I used year of flowers collection, botanical silhouettes, linen/canvas impression plate.


Well that's all from me for now. 
Thanks for looking :)
Tasha

Sunday, July 22, 2012

Tie-Dye paper

Here is my card for the Tie-Dye challenge.

I had SO much fun with this. I made a bunch of different colored pieces so don't be surprized if I suddenly have more tie dye cards to show you :)

I am so frustrated about not being able to photograph this card properly. The acetate is just not co-operating with me and the card looks no where NEAR as nice in the photo's as it does in real life.  I stamped the mehndi medallions on acetate with stazon ink. Then I matted my tie-Dye piece on to white card stock and stamped my sentiment on the bottom corner. I finished it off with some yellow swarovski crystals
You can find a tutorial of how this background was made here.
Well, I'm off to make more cards and have some fun :)
Hope you are having a great Sunday :)
Tasha

Saturday, July 21, 2012

Stamp-a-faire make-n-take

I managed to find some time to play today, and took advantage of it.  I decided to participate in Papertrey inks stamp-a-faire event.  I made Nichole's make-n-take card. Since I do not have the featured stamp set I used my favorite flower set, Rosie posie.
The featured set used a 2 step process to add dimension and since this set does not allow for that, I stamped the flowers in hibiscus burst and then used some prisma color pencils and gamasol to add shading and dimension.  I did the same for the leaves. I quite like the turn out.
Hopefully I will get some time to make another card tonight, if not, perhaps tomorrow :)
Hope you are all having a great weekend :)
Tasha

Friday, July 20, 2012

Christmas in July?

Yes!  It's Christmas in July here in Bella land, and I have a card to share with you.
I used the Cutesy ornaments for this one, and a LOT of distress inks.  I started by heat embossing the magical background with a glitter EP onto white cardstock.  Next I inked it up with tumbled glass distress ink, I then used peacock feathers and evergreen bough on the outer edges of the panel, leaving the center light. I heat embossed the ornaments with detail silver and inked those with distress inks too. I sprayed everythign with pearl water and let it dry. I then went over all the edges with vintage photo. and covered the ornaments with a thin layer of glossy accents.  I lined the two outside edges of my base card with score tape and added glitter ritz in warm highlight.  I did the same on the sentiment strip that was heat embossed with detailed silver.  I put it all together and added some gems and cord.

That's it from me, till next time.
Tasha

Saturday, July 14, 2012

Birdie love

Hiya! I am popping in today to share a quick card.


The moment I laid eyes on this little guy I had this idea. I thought it would make a great valentine or "just cause I love you" card for a guy.  It is pretty simple, and sometimes it's nice to do quick and easy. :) I added some extra texture with a texture plate, and glossy accents.
Hope you are having a good weekend so far :)
Tasha

Friday, July 13, 2012

Lets get inky!

So my mojo have been MIA recently, it always seems to happen at this time of the year. I'm not sure if it's the nice weather, or just being busy trying to keep my kids busy. We don't do camps, so it's up to me to keep them busy through summer.  For this weeks sketch I had NOTHING! Usually I kind of have an idea of what I want to do, sometime it works, sometimes not, but I at least have some ideas.  So I sat down and started playing.
First up is the sketch....
 And here is my card....
Yes, I took some creative liberties, I know, but I think it is close enough, no?:)
I started by using some spray mists to make the background. When I was happy with the color gradation, and let it dry I added some vintage photo to the edges. I then ran it through my bigshot with my sunrise IP.  Next I stamped Em's mixed media flowers onto Bella's best white card stock, and got inky with some distress ink. I broke out my new limeade for the centers and boy, oh, boy do I LOVE that color.  I added some Mustard seed, spiced marmalade, rusty hinge and vintage photo to finish it off. I then added some white to the bubbles with a gel pen.  The sun is from a Studio calico wood veneer pack. I colored the outer piece by pressing it into the limeade pad and the center piece with spiced marmalade distress stain.  I attached it with glossy accents (LOVE this stuff!)  and added a sentiment strip that I distressed with some tumbled glass ink.  and lastly I added some black nailheads to the strip.

Well that's it for today. I am off to friends place for a BBQ. Hope you all are having a great Summer and staying cool ;)

Next weeks challenge is "Christmas in July",  so put on those carols and turn down the air conditioner, put on a scarf and some mitts.... well, maybe not the mitts, you might need your hands to make a card ;)  and join us. E-mail your entries to Emily by Thursday and you could win, win, win :)

Tasha

Friday, July 6, 2012

Emboss resist flower

Hello again :) I'm back with this weeks Bellarific Friday challenge card. This weeks challenge was all about embossing. I could not decide if I wanted to heat emboss or dry emboss, so I did both ;)
So I started by heat embossing the carnation flower head stamp on watercolor paper with off white wow embossing powder. I then used some distress stains in orange marmalade, fired brick and barn door, to color it in. I also colored another one in with peeled paint. Next I sprayed the both pieces with perfect pearl water. While that was drying I embossed my card base with the cuttlebug swiss dots folder and then rubbed some vintage photo distress ink over it to accentuate the dots.  Next I die cut the banner with my Die-namics fishtail flag stax. I lightly rubbed some distress ink over this and heat embossed the sentiment on to it.  I attached this to the card base. Next, I cut the flower out and cut apart the green one to make leaves. I attached the leaves to the side of the flower and popped it onto the banner with dimensional tape.  Lastly, I added some pearls to the center. 

Well, that's it for bellarific friday. Next weeks challenge is another sketch challenge, using this sketch:
I hope you can play along too. If you do, e-mail your entries to Emily by Thursday.

I hope you are all having a great start to the Summer. We have been having lots of fun and really enjoying the sun.  I'll be back to share another card soon:)

Thanks for stopping by.
Tasha

Friday, June 29, 2012

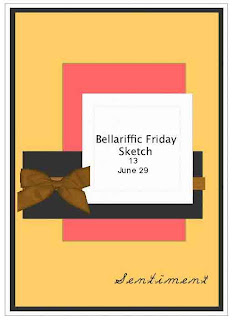
Friday sketch

It's the first day of Summer vacation, and we are starting it off with a bang!  We are heading out to Canada's wonderland for a day of fun in the sun.  So I am stopping by quickly to share my card for this weeks Bellarific Friday challenge.
This weeks challenge was a sketch challenge.  Here's the sketch:


and here is my card:
For this card I used Blow a kiss Jane. I stamped her onto some white bella paper, and then used a wooden frame from studio calico to make a frame.  I colored in the hearts and added some glossy accents to them.

Thnanks for stopping by.
Tasha

Wednesday, June 27, 2012

Birthday card

I'm just popping in quickly to share a card with you that I made for my Son's birthday. I made this one to give him from his youngest brother:
 For this card I used the planets and galaxies stamp.  I cut the stamp apart so that I could play around with the placement of the images.  I stamped and heat embossed the images with white EP,onto black card stock.  I then took a versamark pen and colored in parts of the images and went back with colored EP.  The EP kind of bubbled and mixed to give a lot of texture and a kind of child like coloring effect. I have to say, I really liked it, especially since it was a card from my 18month old to his older brother.  I die cut the number 8 a few times and leyered them to create a chip board number. I coloed it on with silver rub on paint and added a layer of glossy accents. I sprayed the whole panel with shimmer spray and added glossy accent dots to give even more texture.


Friday, June 22, 2012

Make a wish

I can't believe it's Friday again!  Boy, I am sooo looking forward to Summer holidays. To not have to rush around dropping off and picking up kids. To just have time to do NOTHING!  Be careful what you wish for, right? (I know!)  Soon I'll be moaning that they are driving me nuts and that I can't wait for school to start, lol!
Anyway, for this weeks challenge, we had to ink up our favorite Bells and make her into a card. I have so many favorites that it was hard choosing just one. So I went for one I have not inked up yet.
Here it is:
I have ALWAYS loved the ombre look. Recently I am seeing it all over the place, especially on pintrest and I thought about using it here too. I would have liked more of a variation, but I am happy with this.  I kept the rest pretty simple.  Hope you like it.

Next weeks challenge is a sketch challenge"

Anyway, I am off to prep dinner, and get ready for family movie night.
Have a great weekend :)
Tasha
Related Posts Plugin for WordPress, Blogger...